Friday, April 25, 2014

Time for a Spa Day

Wish I were referring to myself! As much as I would love a day at a spa it would likely make me very ill. No, in this case I'm referring to my beloved sewing companion Phoebe:


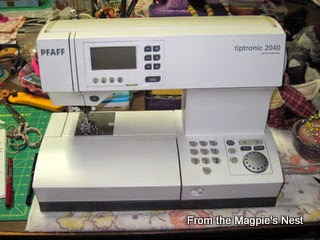
I've had to switch the brand of thread I use for piecing and I thought the issues we were experiencing were due to the change in threads. Apparently that's not the case. Phoebe needs a tune up. Truth be told, she's probably been overdue for a tune up for a year or more.

Before she left home I was able to finish up the Halloween quilt top. I think you may have seen it at this stage in my last post...


I added a lovely tone on tone purple across the bottom and the top and then used a fun orange Halloween print to cap off the ends. It was too big for the design wall at that point so we went outside to get a picture:


It was just a bit windy at the time. We were lucky to get a shot in between rain showers though!

I promised you a detail shot of the prints used in the Rail Fence blocks...


Pumpkins, bats, spiders and webs, more stars. All fun. :- )

I made up some blocks out of scrap patches too:


DS was able to get the top quilted for me yesterday. We decided on a simple meander since there was so much going on in the quilt already.


I've cut binding out of black but have to get a bit more to make it all the way around the quilt. This weekend is the annual street fair that's held in conjunction with the Tulip Festival. That will make it more of a challenge to get out and get supplies but my goal is to get this quilt bound as quickly as possible so I can donate it by the end of the month... which is next week!

Friday, April 18, 2014

Expanding Stars

Remember these?


In my quest to make the Halloween quilt bigger/longer I'd been playing with some numbers in my head. This is one quilter who is not afraid of the math involved in drafting and designing! In fact, I sort of enjoy it. That may be why I've returned to updated traditional quilt making as opposed to the more freewheeling, liberated stuff I was doing a couple of years ago. In any event, I turned these 12" blocks into expanded 18" stars:


My plan is to build this Halloween quilt in a triptych format, with three distinct sections. You've seen what will be the center section in the last post. Now I'm building the sections that will go on either side. Making these stars bigger established the width of these side sections. But how to tie them all together?


I arranged and re-arranged these six blocks repeatedly, trying to get a balance of colors and images across the whole of the eventual quilt top. Finally I just started cutting strips and laying them in place to see what worked and what didn't.


There's a pile of strips that were cut but didn't make it into the end product. It's a little frustrating because they aren't sizes I normally use. I'm sure they will become something someday though. ;- )

This is what I ended up with:


The vertical black sashing will separate these side sections from the center bit. And we'll see what that looks like in the next post!

Tuesday, April 15, 2014

Building Parts Into A Whole

Since my last post I have continued to work on the Halloween panels (see previous post). I sort of got stuck for a few days after I made those first blocks out of the fussy cut images. Eventually it occurred to me to look for prints to frame up the biggest panel into a more workable size.


That wide black border has little stars all over it. That gave me the idea to make star blocks to be cornerstones in a border to surround the panel. Plus they will echo the 12" star blocks I made out of a couple of the smaller panels.


Of course I fussy cut more Halloween imagery to be the centers of the stars! The next problem was what to use to fill in between the stars. Since I'd already used straight strips to turn images into blocks I decided to use more straight strips in Rail Fence blocks around this big panel. Repetition creates unity you know. ;- )


I say "big" but it was only about 13 x 22 inches when I liberated it from the original yardage. With the wide black border and Rail Fence blocks surrounding it I now had a panel about 30 x 42 inches. Honestly, I need to get you some detail shots! There are some cute prints in those Rail Fence logs! Hopefully when you double click on the photographs they will get big enough for you to see more details.

There was still an 8 x 6" panel unframed and unused at this point. It had continued to float above this Trick or Treat panel on the design wall so I looked for ways to incorporate it into what would become the middle section of the finished quilt.

I had to rummage around in my stash to find anything that would be in the same color palette and style of the images from the yardage I began with. These are nice clear hues and a lot of what I have has a gray tone to it. I did find some other small panels however. I was able to cut them down to be the centers of yet more Variable Stars and they went on either side of the 8 x 6" panel, also framed up with strips.


At this point this section of the quilt top measures about 30 x 53.5 inches. Good enough. Now to figure out how to build up the rest of the blocks and panels to make up the rest of the quilt top...!

Monday, April 7, 2014

From One Quilter to Another

When my friend C~ was cleaning out her stash recently she came across this cut of Halloween panels:


There were a few strips of coordinating prints too. The panels were intended to make a banner and assorted trick or treat bags. C~ had not been inspired to do anything with these panels, even though they are as cute as they can be. She asked if I would be interested in doing something with them. Would I? Do little monsters love candy corn? ;- )

The first thing I did was to fussy cut the various panels and images.


This is pretty much how they landed on the design wall after cutting. Naturally they are not any regulation size or shape. Pre-printed panels rarely are in my experience. That just makes the challenge of using them more interesting! Some of the pieces could be easily framed up to a workable size and that's just what I did. In this first block I framed smaller images, turned them into a 4-Patch unit, and then framed that up to 12 inches.


The ghost below just got strips added until he was also 12" square.


I actually had yardage of a couple of the designer's companion prints already in my stash. That made if pretty simple to create this 12 inch star block featuring the bats panel.


But my absolute favorite is this star:


It just makes me happy every time I look at it! I had the purple plaid in my stash (but not much of it), the orange and yellow check was one of the strips that came with the panels, and the background is a flying frog print I've had forever and is now just about gone.

I'm thinking this will become a quilt for a child. It may go to someone in Foster Care or it may go to one of the children affected by the landslide in Oso and Darrington, WA. I've been doing hand work since my last post; it may be a bit of a challenge to switch gears back to piecing...


Wednesday, April 2, 2014

Hangin' On

Life has been winning since my last post. Fingers crossed, and don't let anyone hear me say it, but I think I may finally be getting the upper hand once again.

I knew part of the problem was that I was starving for visual stimulation. We actually had a couple of sunny days recently so I took the opportunity to have a drive around the farm lands just outside our city limits. There aren't many places where it's either safe or legal to stop and take pictures but I found a lonely stretch of road and snapped this:


That line of bright yellow is a field of daffodils in bloom. Very soon there will be tulips of every hue making the most beautiful living patchwork quilt you could ask for. These are the truths we need to remember during the long, gray, wet months that precede spring around here!

Of course I had to renew the bouquet in The Magpie's Nest too.


DH took a few hours off from his job this afternoon and we went down to Hobby Lobby together. I'm not sure I can think of a better place for visual stimulation, at least not in our little town. It was hubby's first time in the store. All things considered, he held up pretty well! It may have helped that he now has a framed print to hang in what was once our living room but is now his personal home theater. (Something on this order but not this one.) I came home with a couple of charms and two small bags of flower sequins. Oh, and a new cosmetic bag to stitch.


This is what my work station looks like tonight. Layers. There's evidence of the beading I'd been doing and bits and pieces for at least three other projects. It really needs a good sorting out.     ~ maybe tomorrow ~

I've been working on the needlepoint case you see on the right but was trying to pace myself so it wouldn't be finished too quickly. Unfortunately, needlepoint has been about all I've been able to do lately. I was thrilled to find the blackbird case on sale at HL. I've stitched that design up a couple of times in smaller coin purses and have given them away to good friends. Now I get to stitch (and keep) a bigger one! Not sure what will become of the navy and lime case...

DH and I are now collaborating on embellishments for the hearts representing our children on the anniversary quilt (see previous post). We don't have anything I can sew on yet but he can shop in places I can't so hopefully between the two of us we'll get it figured out.

 I do have a fun project on the design wall, instigated by my friend C~. You'll have to wait for the next post to learn about it however. (Aren't I wicked!)